
Curating Your Art Gallery Wall: The Simple Way

Have a space on a wall that needs some life and inspiration, but can’t commit to nailing anything down permanently? I have the perfect method for you, and all you need is painter’s tape! 😊
In front of my working area, I’ve curated a wall filled with art prints, postcards, memorable photos, expressions and more. Each and every time I see my wall, it inspires and reminds me to remain positive and forward-thinking. And the best part? I can change it up however I please, without ruining the wall!
Step 1: Close your eyes and think of a vibe
Where do you feel the most you? Any places you love that you want to be reminded of? Think of those special places, and cater your wall to evoke those feelings. While imagining this scene in your mind, make note of the shapes, colours, animals and plants (if any), textures and smells. Now, describe what you see in adjectives.
Taking my gallery wall as an example, I usually keep to the same theme and find items that relate back to it. My favourite place to be is with incredible company during balmy evenings where I can feel the warmth on my skin, be steps away from nature or a shoreline, all while realizing moments that shape me. Putting that into adjectives, my wall is: introspective, soft yet edgy, passionate and nostalgic. Aesthetically, this means I‘d use neutrals, pastel sky tones, strong linework (which reflects my art style), clever idioms, art prints and photographs.
I also love collecting clothing and fashion tags of select pieces I own. Style is a visual representation of your inner self, so the things I buy reflect my style, which still relate back to my theme: soft and edgy with a little bit of badass 🙃. The clothing tags I have on my wall are Saint Laurent, Babaton, Talentless, The Beach People, Ksubi and Thrills Byron Bay.
Ideas for your wall
Stuck on where to find your images? Try flipping through magazines, print out inspiration from Pinterest and collect local art! I have a bunch of prints available in my shop, as do other artists. You can also collect postcards, ticket stubs, polaroid photos, dried foliage, canvas and fabric swatches, stickers etc. For the stickers, keep the original adhesive on the back of the sticker and use painter’s tape to stick it to the wall.
Step 2: Gather your materials and lay it out

Figure 1 – Margins and spacing. Keep each print the same distance all around. For example, the dragon art postcard has a 1-2cm distance from the surrounding art prints.
Now that you have an idea of what you want to place on the wall, lay out your items on a flat surface. You can line them up in a grid if each print is identical in size, or create interest by arranging them in a staggered layout. The beauty in this moodboard method is that you can rearrange prints as you place them on the wall! You can also place one print on the wall and hold the subsequent print next to the one you just adhered, to see if it matches.
Margins and Spacing
For spacing, take a look at Figure 1 (lol only way I can point it out – welcome to Parmeet’s lecture 😉) where you see how each print is equidistant to the other prints. You don’t have to measure this out, but you can if it makes it easier. For prints that are smaller than others like my Home is Toronto sticker, align the midline with the print above or below. It will create a nested effect.
Painter’s tape is your best friend for small pieces
You’ll adhere each print using painter’s tape, which allows for flexible placement and allows you to switch it up as you collect new prints and materials.
I want to create this moodboard wall around an existing, framed piece!
You sure can! Naturally for heavier pieces like framed photos or mirrors, you will want to secure those either with a nail or using double-sided wall tape if it’s lighter. Then, you can build around that framed piece by adhering your smaller prints. As an example, the print in my black frame has always been on my wall, so I decided to build around that piece. You can even build around plant pots that are on a wall! The possibilities are endless – here are some more ideas that I drew out as layouts to get you started!
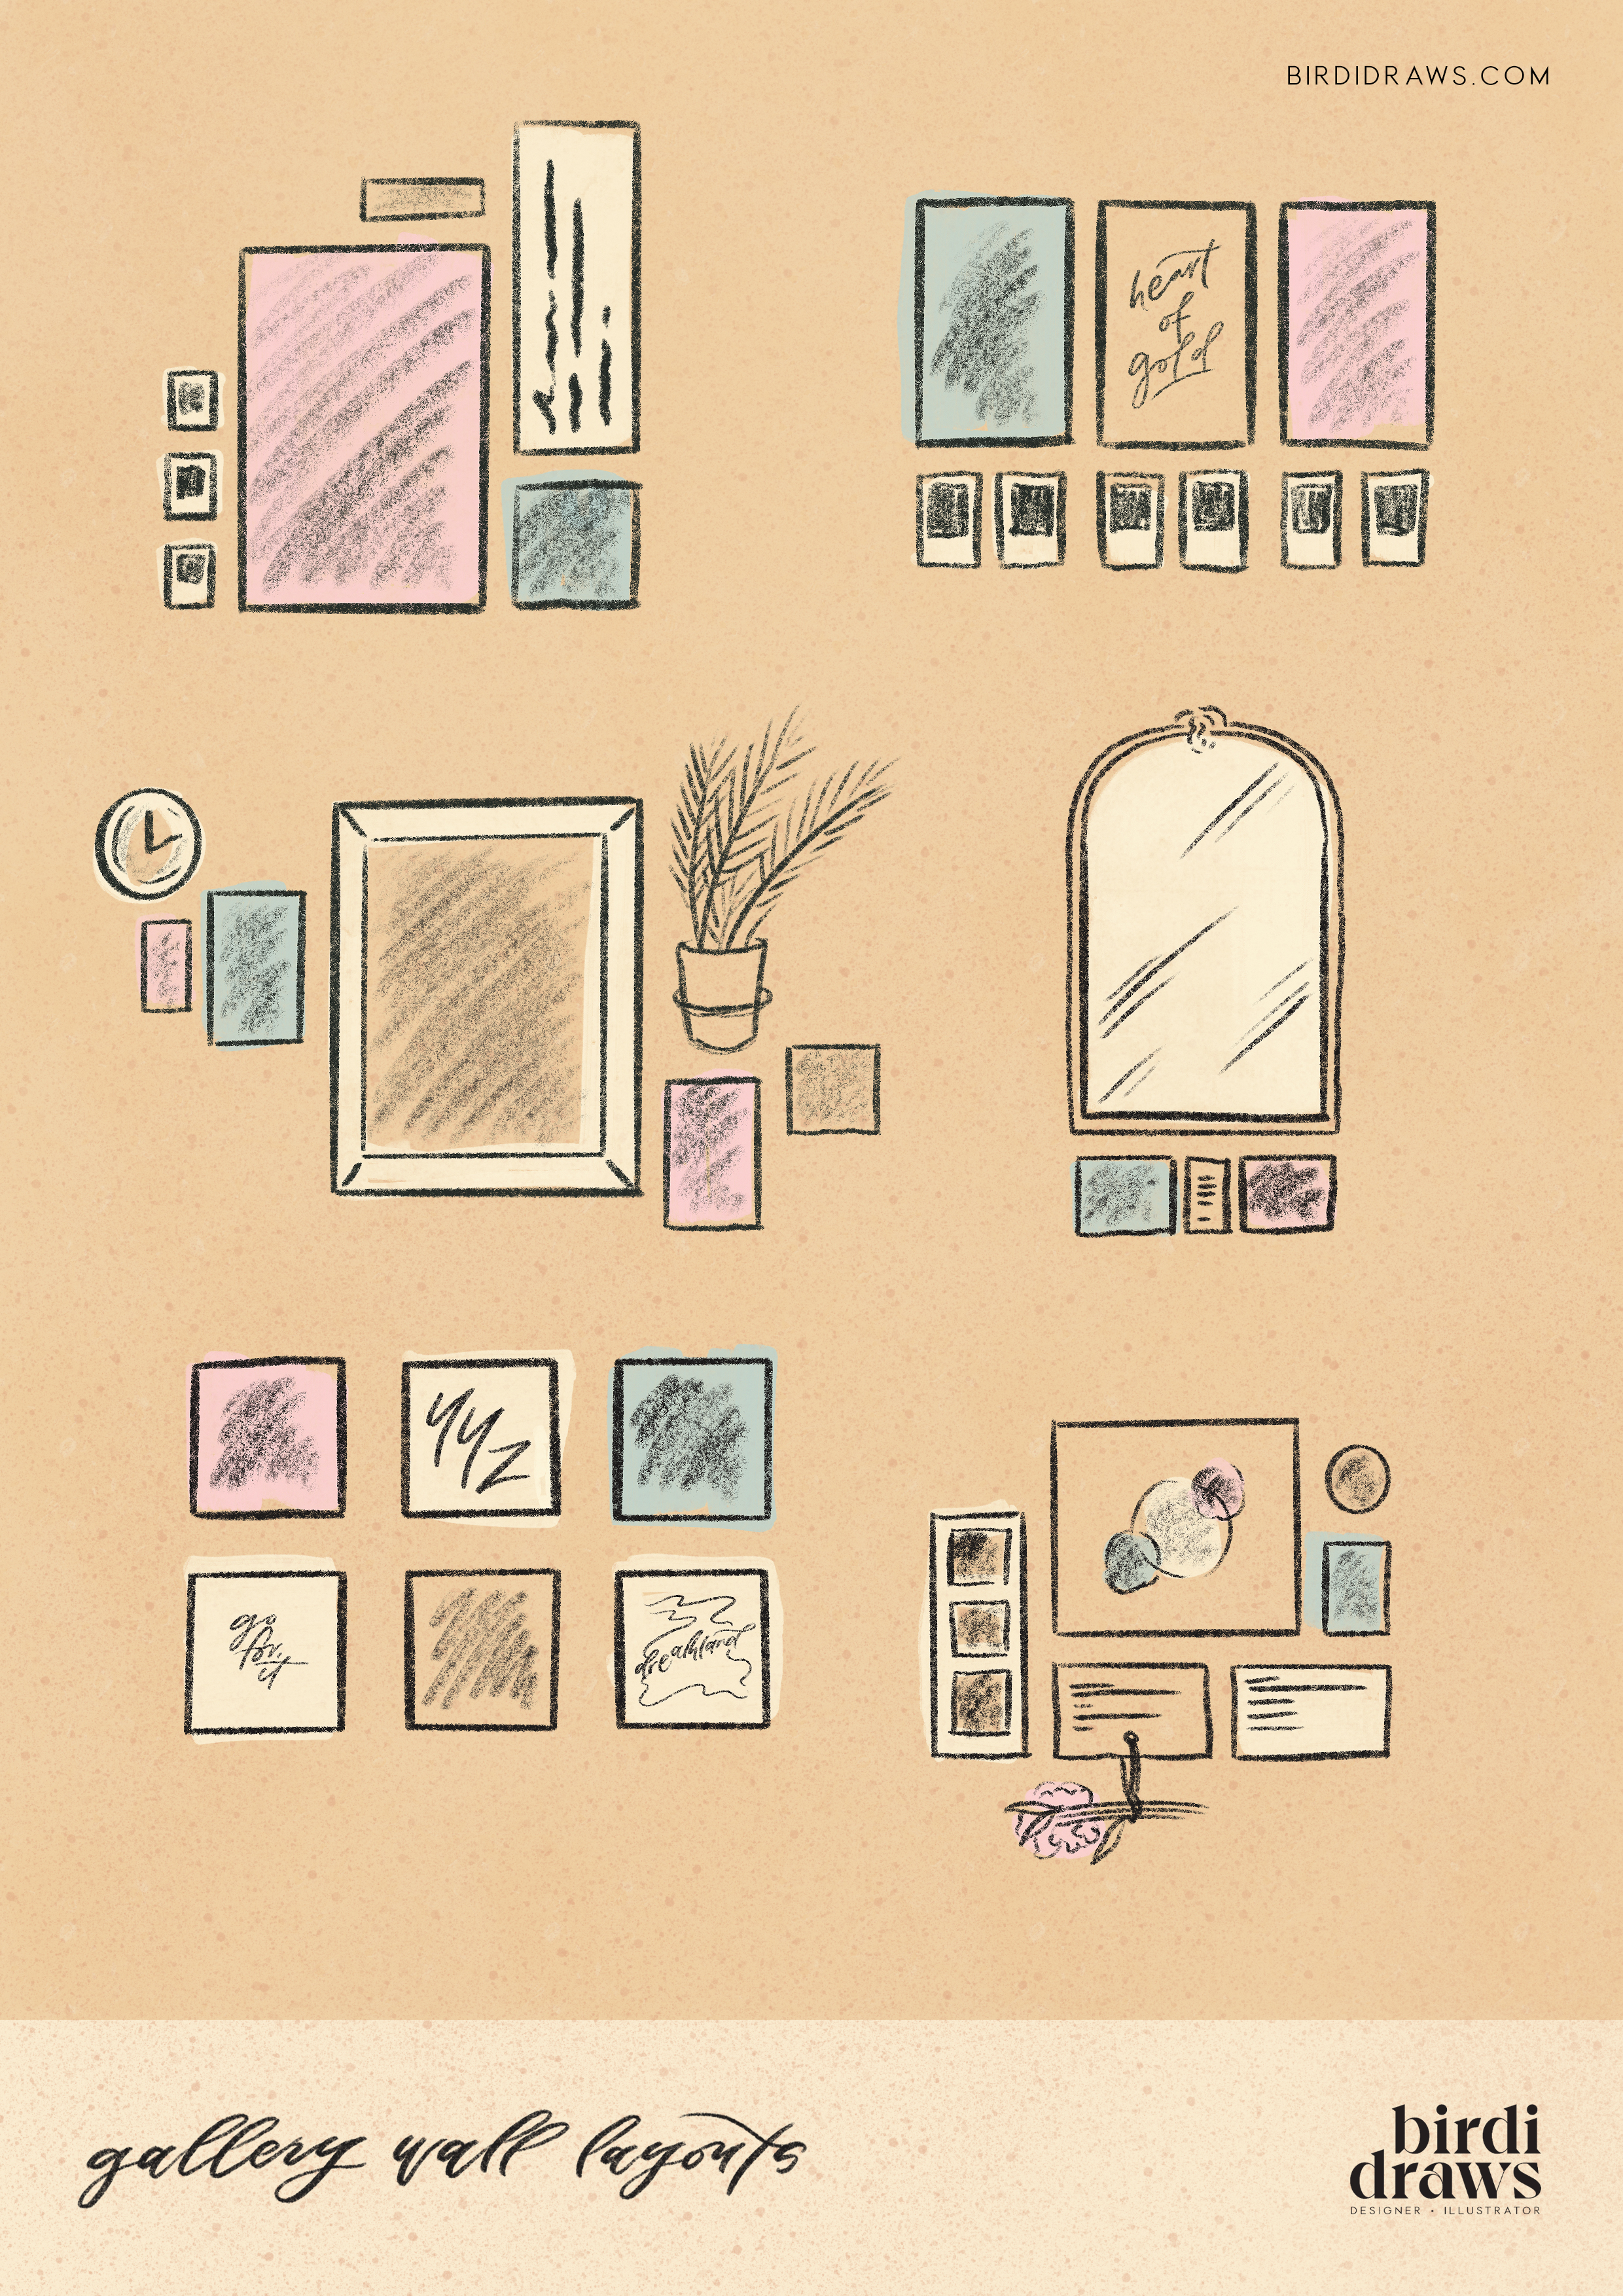
Download a free illustration on different ways to style your wall!
Splitting typography with images
You might have some prints that are text-only, while others are images. My advice would be to separate the text-only pieces and lay them next to images and other items with less text. Naturally, humans tend to read words first and then explore imagery. By placing the text-only places in different areas of your gallery wall, you’re allowing the eye to move around and see each piece distinctly.
Take a look at some layout ideas through this free infographic that I created! Download here (.JPG).
Step 3: Keep it simple – curate & refine
Once you have your gallery wall created, you can admire it forever or change it with your mood! I like to change mine up from time to time, usually when I collect new postcards or prints. Now depending on your wall space, you want to ensure there is harmony between the prints by being intentional with what you’re placing on the wall. Ask yourself if the new items fit with the aesthetic you’re after. That might mean that some prints can be removed to make way for more, which is perfectly okay!
I hope you enjoyed this post on how to add a little more art and style to your surroundings! Happy curating 😄

